Monday 24 November 2014

Claymation

My Claymation


A claymation is an animation made up of lots of photos that are put into a sequence to create a moving picture. Clay models are used and are moved very slightly every frame, well known claymations include Wallace and Gromit, Morph and Pingu. 

Wallace and Gromit

Before taking any photos you must consider lighting because it must stay the same during the whole scene, this means that you can't rely on natural light as it changes throughout the day. The frame size and the position of the camera has to stay the same as the animation will not be smooth.

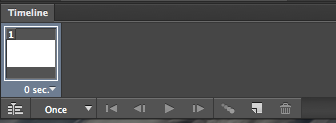
Once you have taken all the images that you need to import them into After Effects. Make sure the composition is set to 1080HDTV 25, this is the standard for the UK. When importing the images you can import them all at the same time as a sequence. This save a lot of time however it means that all the images are in order of its number otherwise if you skip a number a blank frame will be added.

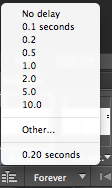
The frame rate was set a 10fps this means that is is quite jumpy. To make the animation smoother you can add more frames which increases the FPS. The standard frame rate of most claymation is 24fps, this means that for full length claymation films, such as Wallace and Gromit, it can take years to create.

Monday 10 November 2014

Frame Animation


This is my frame animation made using Photoshop


To make animation you must open Photoshop then click 'File' then 'New' this window will then appear. Select 'Custom" preset and change the width to 1920p and the height has to be 1080p.

 At the bottom in the timeline there should be a button that should say either Create Frame Animation or Create Video Timeline, select 'Create Frame Animation' and click it. Then a blank timeline will appear.


Change the loop option to forever, this means that it will constantly loop without stopping. Also set the length of the frame to 0.2 seconds, this means that each frame will stay on for 0.2 seconds then it will change and the frame rate 5fps (frames per second). The shorter the frame length means that the frame rate is higher so the film is smoother.


 You can change the tools to motion tools by selecting 'Motion' at the top right corner.


You can then add layers and draw what you want on each layer for each frame. Then select the frame and choose what layer you want to see using the little eye button. You need to do this for every frame.

To save the animation you need to go to 'File', 'Save for web' then I made the resolution smaller by changing it to 50% this is so that it can easily be upload to the web. You can preview the animation to check that it all works. Then click save and choose where you want to save it, then it will be saved as a GIF.